Garbage disposals have become a standard fixture in many modern kitchens, offering homeowners an efficient way to dispose of food waste. By grinding up scraps and flushing them down the drain, disposals help reduce clutter in garbage bins, minimize odor, and simplify kitchen cleanup. However, understanding the installation, maintenance, and care of garbage disposals is crucial for optimal performance and longevity. This comprehensive guide will delve into everything you need to know about home garbage disposals, ensuring you have the knowledge to install, maintain, and care for this essential kitchen appliance.
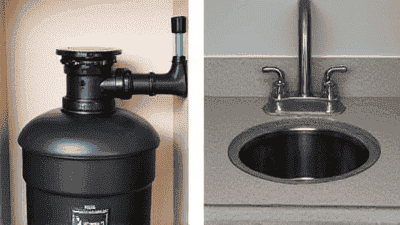
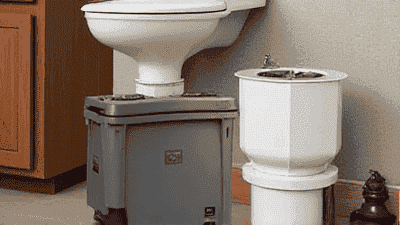
A garbage disposal is a kitchen appliance installed under the sink that grinds food waste into small particles, allowing them to flow through the plumbing system. It consists of a motor, grinding chamber, and a flywheel that breaks down food into fine particles. Garbage disposals reduce the volume of waste that goes to landfills and prevent unpleasant odors from decaying food in trash cans.
There are several advantages to having a garbage disposal in your kitchen:
Convenience: Garbage disposals make kitchen cleanup quicker and easier by allowing you to dispose of food waste directly into the sink.
Odor Reduction: By disposing of food waste immediately rather than letting it sit in your garbage can, disposals help minimize unpleasant smells.
Waste Reduction: They contribute to a reduction in overall waste, helping to lower your carbon footprint.
Pest Prevention: Fewer food scraps in the garbage can mean reduced attraction for pests such as rodents and insects.
Improved Plumbing Health: Properly used disposals reduce the risk of plumbing clogs caused by large food scraps.
Despite these advantages, it is essential to know how to use and maintain a garbage disposal correctly to avoid potential issues.
Before installation, it is important to select the right garbage disposal for your kitchen. Consider the following factors when making your choice:
Garbage disposals typically range from 1/3 horsepower to 1 horsepower or more. The higher the horsepower, the more powerful the unit and the better it can handle tough waste.
1/3 Horsepower: Suitable for smaller households or those that generate less food waste. Best for light use and softer foods.
1/2 Horsepower: A good middle-ground option for average households, capable of grinding softer bones and fibrous vegetables.
3/4 Horsepower: Ideal for larger households or those that frequently prepare foods with tough waste. Can handle larger and harder food scraps efficiently.
1 Horsepower and Above: These models are designed for heavy use and can grind tough food waste, including large bones and fibrous materials. Generally found in commercial settings.
Garbage disposals come in two main types regarding operation:
Batch Feed: Requires a specific stopper to activate, making them safer as they cannot operate unless the stopper is in place. This model is ideal for those concerned about safety, especially in households with small children.
Continuous Feed: These are powered on by a wall switch and can continuously grind food as long as they are running. They are more common in homes and are convenient for quickly disposing of food scraps during meal prep.
Noise can be a factor when selecting a garbage disposal, especially if you are sensitive to sound. Many newer models come with sound insulation features to reduce noise during operation. Make sure to read reviews and specifications before making your purchase.
Locate disposals with stainless steel grinding components, as they are more durable and resistant to rust and corrosion. These materials can enhance the unit’s longevity and overall performance.
Consider the warranties offered by different manufacturers and choose reputable brands known for quality and customer satisfaction. A strong warranty can provide peace of mind for potential repairs or replacement parts.
Installing a garbage disposal may seem daunting, but with the right preparation and tools, it can be a manageable DIY project for most homeowners. However, if you do not feel comfortable working with electrical or plumbing components, it is always best to hire a professional. Below is a step-by-step guide for homeowners ready to tackle the installation themselves.
Before starting the installation, gather the following tools and materials:
Turn Off Power: Ensure the power to the kitchen sink is turned off at the circuit breaker to prevent electrical shocks.
Remove Existing Components: If replacing an old disposal, detach any existing components, including the mounting assembly and drain lines. Use a bucket to catch any water that may drain out during this process.
Attach the Mounting Ring: Place the mounting ring on the sink’s drain opening, aligning it with the sink flange. Secure it in place with the screws included in the installation kit.
Seal with Plumber's Putty: Apply plumber’s putty around the underside of the sink flange before securing it to prevent leaks.
Connect the Disposal to the Dishwasher (if applicable): If you have a dishwasher, connect its drain hose to the garbage disposal’s inlet. Ensure a snug fit and secure it using a hose clamp.
Connect the Disposal to the Drain Line: Use the included flange or a suitable connector to attach the disposal outlet to the drain line. Ensure that all connections are secure to prevent leaks.
Wiring: If your disposal does not come pre-wired, you will need to connect it to your home’s electrical supply. Refer to the manufacturer’s instructions for wire color codes:
Attach Cover Plate: After connecting the wires, secure the cover plate and ensure no wires are exposed.
Position the Disposal: Align the disposal’s mounting flange with the previously installed assembly. Turn the mounting collar clockwise to lock it into place.
Tighten Connection: Use a wrench to ensure that the mounting collar is securely fastened.
Restore Power: Turn the power back on at the circuit breaker.
Run Water: Allow cold water to flow through the disposal for about a minute, then turn on the disposal to test its operation. Check for any leaks at the connections.

To maximize the efficiency and longevity of your garbage disposal, regular maintenance is essential. Here are best practices for taking care of your disposal:
Using your disposal regularly helps it function effectively. If food waste is consistently flushed through the system, it reduces the likelihood of clogs and build-up.
Always run cold water while the disposal is in use. Cold water helps solidify any grease or fats, making it easier for the disposal to grind and flush them away.
Certain foods can cause damage to the disposal or lead to clogs. Avoid grinding:
Keeping your disposal clean helps prevent odors and buildup. Here are simple cleaning methods:
Baking Soda and Vinegar: Pour 1 cup of baking soda down the disposal, followed by 1 cup of vinegar. Let it sit for 10-15 minutes before flushing with hot water. This method helps eliminate odors and remove buildup.
Ice and Salt: Running ice cubes and salt through the disposal can help sharpen the blades and clean the grinding chamber. Use coarse salt and a handful of ice cubes, then run cold water as you operate the disposal.
Running the disposal even without food waste helps ensure it remains operational. Doing this will help avoid rust and other issues.
If you notice a foul smell coming from the disposal, it may be due to trapped food residue. Running clean water through it regularly and using the cleaning methods mentioned above will help combat this issue.
Over time, the seals and blades of the disposal can wear down. Regularly check to ensure the unit is operating correctly and look for signs of wear. If you notice any issues, consider contacting a professional for help.
Like any appliance, garbage disposals can experience problems. Here are some common issues homeowners may face, along with troubleshooting tips:
If your garbage disposal is not working, follow these steps:
A humming sound may indicate that the motor is running, but the blades are jammed. To remedy this situation:
If you notice water pooling under the sink:
If unpleasant odors arise from the garbage disposal, clean it using the previously mentioned baking soda and vinegar method. If odors persist, you may need to investigate for trapped food that needs to be removed.
While you can manage many installation and maintenance tasks yourself, some scenarios require professional assistance. Consider hiring a qualified plumber or electrician for the following situations:
Installation of Complex Systems: If you are installing a new system or upgrading to a more complex model, enlisting professional help can ensure everything is done correctly and safely.
Electrical Issues: If your garbage disposal experiences electrical problems or repeatedly trips the circuit breaker, a professional can troubleshoot and resolve these issues.
Significant Plumbing Issues: If the disposal is causing major drainage problems or if you suspect plumbing issues, it is best to consult a professional.
Replacement: If your garbage disposal is old, worn out, or experiencing recurring issues despite maintenance, a professional can assist with replacement and ensure proper installation of the new unit.
A garbage disposal is an invaluable asset that can greatly enhance the efficiency and cleanliness of your kitchen. By understanding how to properly install, maintain, and troubleshoot your garbage disposal, you can extend its lifespan and optimize its performance. Remember to choose the right unit based on your household needs, follow appropriate maintenance practices, and address any issues as they arise. Whether you manage most tasks on your own or enlist the help of professionals, a well-cared-for garbage disposal will serve you well in managing kitchen waste effectively. Embracing these practices will allow you to enjoy the many benefits a garbage disposal offers, contributing to a cleaner and more efficient kitchen for years to come.